Writing6 min read
Mastering In-App Communication with Event Bus
How to build an event bus for communication in a micro frontend architecture.
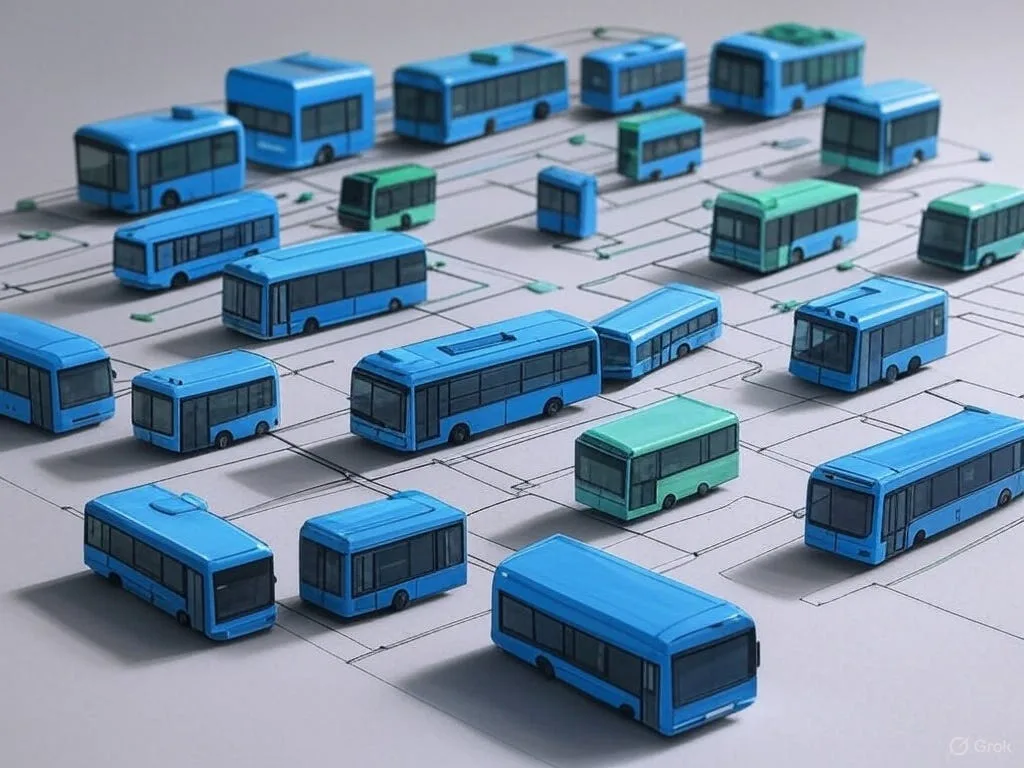
Communication in micro frontends is a challenging problem, just like it is in backend systems that use microservices. By using an event bus with a publish-subscribe model, we can enable communication between applications (modules or pages) without establishing direct connections.
We can also incorporate the fire-and-forget principle into this communication model. This principle means that once an application publishes an event, it doesn’t concern itself with whether or not the event is handled by other applications. The publisher does not expect any feedback about the successful receipt or processing of the event. This improves the performance of the publishing application and prevents potential delays caused by communication errors. Event Bus can be used for communication between pages, in-app modules, or even between micro apps.
How?
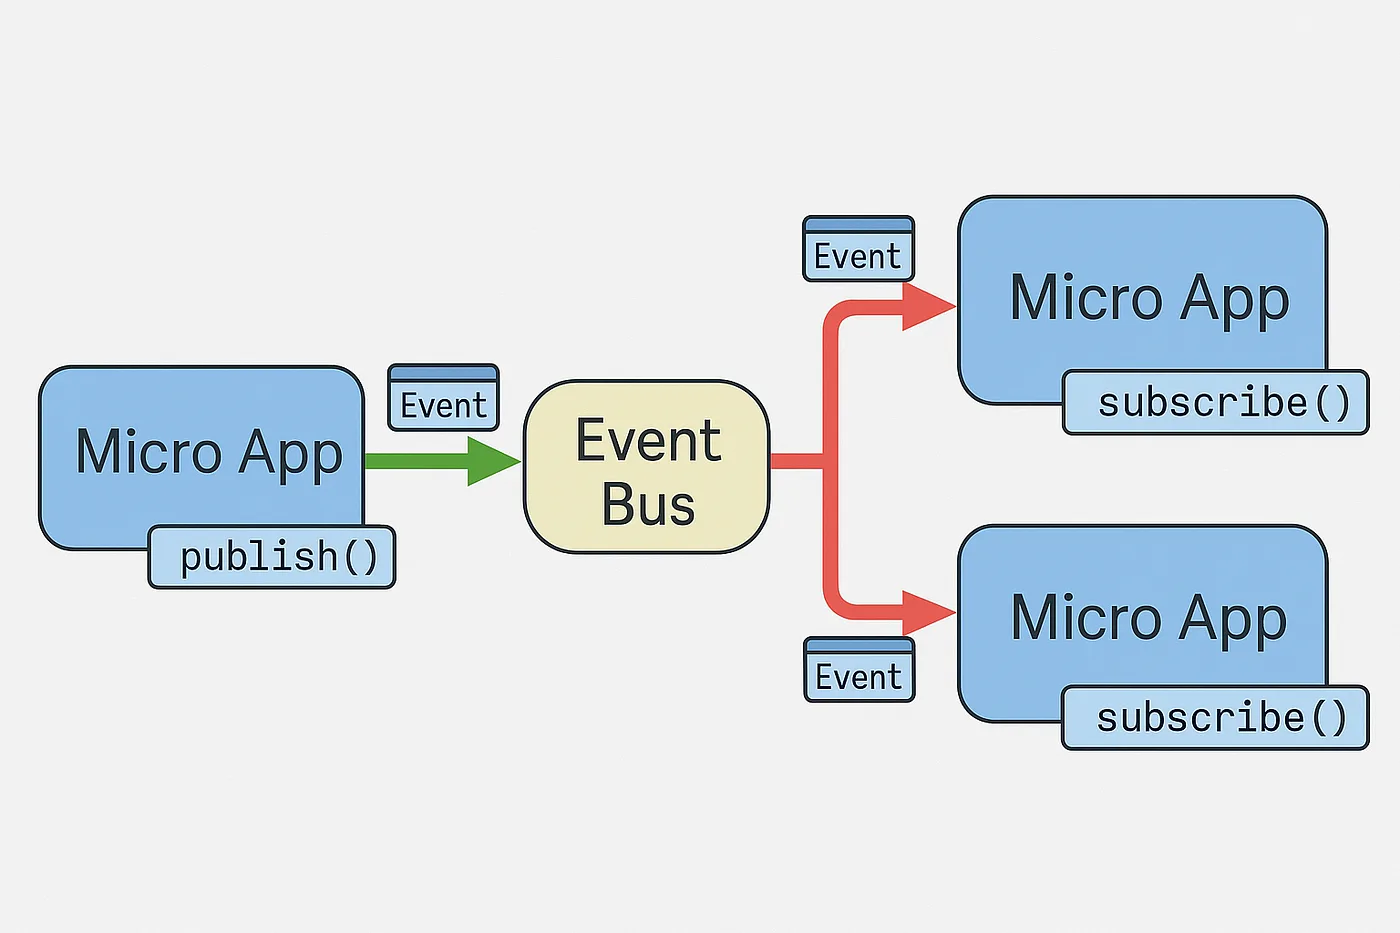
A simple micro frontend event bus typically consists of the following core components:
- Central Event Manager: This is a central object or module responsible for publishing events and distributing them to subscribers. It is typically exposed as a singleton instance that can be accessed by all micro frontends.
- Publish Mechanism: A function that allows micro frontends to emit events with a specific event name (e.g.,
"user-logged-in","product-added-to-cart") and optional data. This mechanism enables micro frontends to notify others about certain actions or changes. - Subscribe Mechanism: A function that allows micro frontends to subscribe to specific event types. When a micro frontend subscribes to an event, it is notified via a callback function whenever that event is published.
- Unsubscribe Mechanism (Optional): A function that allows micro frontends to cancel their subscriptions to event types they are no longer interested in. This helps prevent unnecessary notifications and improves performance.
Why?
There are several important reasons to use a simple event bus in a micro frontend architecture:
- Loose Coupling: One of the most important reasons. Instead of communicating with each other directly, micro frontends communicate indirectly through events. This reduces the likelihood that a change in one micro frontend will directly impact others, making it easier to develop and deploy them independently.
- Scalability: Since micro frontends are independent, each one can be scaled individually as needed. The event bus helps maintain this independence and contributes to the overall scalability of the system.
- Reusability: An event published by one micro frontend can be listened to and used by multiple other micro frontends. This reduces code duplication and makes it easier to integrate different features.
- Technology Diversity: Different micro frontends can be developed using different technologies. The event bus abstracts the communication between them, allowing these heterogeneous technologies to work together seamlessly.
- Team Autonomy: Different teams can work independently on their own micro frontends. The event bus reduces the need for coordination between teams, enabling them to work faster and more efficiently.
How It Works
- A specific event occurs in a micro frontend (e.g., a user clicks a button).
- This micro frontend uses the publish mechanism of the event manager to emit the event, along with its name and relevant data.
- The event manager identifies all micro frontends that have subscribed to this event.
- The event manager invokes the registered callback functions of each subscribed micro frontend, passing the event data.
- The subscribed micro frontends can then update their internal state or perform other actions based on the received event information.
Installation
To use event bus in Flutter, you need to add the event_bus_plus package to your project. After adding this package to your pubspec.yaml file and running the flutter pub get command, you can start using it.
dependencies:
  event_bus_plus: [latest_version]
AppEventBus
It is a globally accessible singleton Event Bus manager within the application. It contains dedicated Handler classes that listen to and manage different types of CustomEvents. Each Handler encapsulates and manages the Event Bus communication for a specific module or feature. This structure serves as a central event manager to enable loosely coupled communication between modules.
final IEventBus _eventBus = EventBus();

final class AppEventBus {
  AppEventBus._();

  static final AppEventBus instance = AppEventBus._();

  final forceUpdate = ForceUpdateBusHandler(_eventBus);
  ...
}
EventBusHandler
This class is a generic base class used by all custom Event Bus handlers. T represents the event type that extends from the AppEvent class. Each EventBusHandler instance encapsulates the listen and fire operations for its own event type T.
This structure is primarily designed for one-to-one communication scenarios (where a single event is handled by a single listener). However, it can also be used in one-to-many communication scenarios (where an event is listened to by multiple different processes). To achieve this, it is sufficient to override the listen function in the subclasses.
base class EventBusHandler<T extends AppEvent> {
  EventBusHandler(IEventBus eventBus) : _eventBus = eventBus;

  final IEventBus _eventBus;
  StreamSubscription<T>? _subscription;

  void fire(T event) => _eventBus.fire(event);

  void listen(void Function(T)? onData) {
    cancel();
    _subscription = _eventBus.on<T>().listen(onData);
  }

  void cancel() {
    _subscription?.cancel();
  }
}
Example: ForceUpdateBusHandler
This class, EventBusHandler, manages the event triggered when the user is required to update the app. It works in conjunction with the ForceUpdateEvent and ensures that an update prompt is shown to the user.
The ForceUpdateEvent is fired with the information about the new version of the app that needs to be updated. This event should be triggered at the appropriate time based on the app’s business logic — for example, as a result of a Firebase Remote Config check or an API call.
This structure helps decouple the UI layer from the business logic, making the update prompt mechanism modular and reusable.
final class ForceUpdateBusHandler extends EventBusHandler<ForceUpdateEvent> {
  ForceUpdateBusHandler(super.eventBus);
}

final class ForceUpdateEvent extends AppEvent {
  const ForceUpdateEvent({required this.newAppVersion});
  final String newAppVersion;

  @override
  List<Object?> get props => [newAppVersion];
}
AppForceUpdateInterceptor
For example, a Dio interceptor checks the x-app-version header in every API response and compares it with the current app version installed on the device. If the response version is newer, the ForceUpdateEvent is triggered. This way, the user is centrally and automatically notified that an app update is required.
final class AppForceUpdateInterceptor extends Interceptor {
  const AppForceUpdateInterceptor();

  @override
  Future<void> onResponse(Response<dynamic> response, ResponseInterceptorHandler handler) async {
    final appVersion = response.headers.value(AppConstants.appVersionKey);
    final requiredMinVersion = ...;
    final currentVersion = ...;
    if (requiredMinVersion > currentVersion) {
      AppEventBus.instance.forceUpdate.fire(ForceUpdateEvent(newAppVersion: appVersion));
    }

    return handler.next(response);
  }
}
MainApp
Since the forced update event needs to be listened to throughout the entire application, it is subscribed to in the initState method of the MainApp widget, which is launched with runApp.
final class MainApp extends StatefulWidget {
  const MainApp({super.key});

  @override
  State<MainApp> createState() => _MainAppState();
}

final class _MainAppState extends State<MainApp> {
  Future<void> init() async {
    AppEventBus.instance.forceUpdate.listen(
      (forceUpdateEvent) {
        showDialog(
          context: AppConstants.navigatorKey.currentContext!,
          builder: (context) => AppForceUpdateDialog(),
        );
      },
    );
  }

  @override
  void initState() {
    super.initState();
    init();
  }

  @override
  Widget build(BuildContext context) {
    return MaterialApp.router(...
  }
}
Conclusion
Apart from the force update event, this structure can also be used in scenarios such as inter-module navigation, maintenance mode management, global logout actions, real-time banner notifications, and triggering page-level data refreshes.
The Event Bus provides a flexible and scalable communication model while preserving modular independence. When properly designed, it simplifies the overall application architecture and enhances reusability.